【Hexo】心路歷程 - 打造屬於自己的 Blog

我知道網路上的 Hexo 教學文章超級無敵爆炸多!
雖然有用 Git 紀錄每一次的更動,但這邊還是想要紀錄一下我設定 Hexo 的一些想法,給以後的自己看。
主題選擇
Hexo 最常見的主題為 Next,資源最多需要踩雷當然也減少,所以我也是選擇這樣組合,另外還有些主題也不錯功能蠻多的:
Hexo 設定
以下設定沒特別說明將會是
_config.ymlHexo 設定檔案。
語系
1 | language: zh-TW |
Permalink 與 Post 檔案分類原則
Permalink 預設非常的長,為了簡化網址需要調整一下。
文章按照年份去分類,像是 source/_posts/2022/vscode-plugins.md ,由於文章已經有資料夾,而資料夾也會顯示在網址上, Permalink 就不需要有 year 了,只要設定為:1
permalink: :title/
分類與標籤
category_map 和 tag_map 會對應網址連結,沒特別設定會有變中文網址,對 seo 不太友善1
2
3
4category_map:
🌐 網路: network
tag_map:
Home Assistant: home-assistant
Hexo Plugin
Sitemap
https://github.com/ludoviclefevre/hexo-generator-seo-friendly-sitemap
產生 Sitemap,記得上傳到 Google Search Console
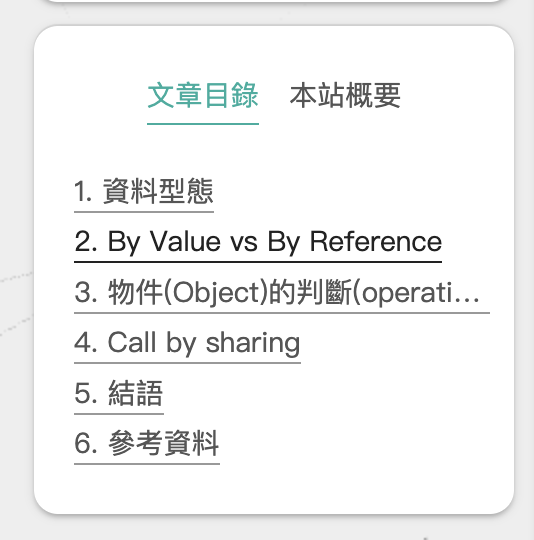
SearchDB - 網站搜尋功能
https://github.com/next-theme/hexo-generator-searchdb
網站搜尋功能
Next 選單打開 search 連結 _config.next.yml1
2local_search:
enable: true
Optimize - 優化 js, css
https://github.com/next-theme/hexo-optimize
預設 js 和 css 都不會處理過,優化一下加快速度和 seo
Related Posts - 相關文章
https://github.com/sergeyzwezdin/hexo-related-posts
由 Next 推薦的 plugin,顯示設定都預設在 Next 設定檔內了1
2
3
4
5
6# Related popular posts
# Dependencies: https://github.com/sergeyzwezdin/hexo-related-posts
related_posts:
enable: false
title: # Custom header, leave empty to use the default one
display_in_home: false
但是 Next 顯示的連結有問題,且會顯示日期、標題、預覽,顯示太多資訊,所以改為自訂義顯示
_config.next.yml1
2
3
4
5custom_file_path:
postBodyEnd: source/_data/post-body-end.njk
related_posts:
enable: false # custom show on post-body-end.njk
source/_data/post-body-end.njk1
2
3
4
5
6
7
8
9
10
11
12
13
14
15
16
17
18
19
20
21
22
23{# 顯示相關文章 #}
{# 編輯於:_partials/post/post-related.njk #}
{%- if page.related_posts and page.related_posts.length > 0 %}
<hr>
<h2 class="popular-posts-header">{{ theme.related_posts.title or __('post.related_posts') }}</h2>
<ul class="popular-posts">
{%- for path in page.related_posts %}
{%- set popular_post = site.posts.findOne({ path: path }) %}
<li class="popular-posts-item">
{# {%- if popular_post.date %}
<div class="popular-posts-date">{{ date(popular_post.date) }}</div>
{%- endif %} #}
{# {%- if popular_post.img %}
<div class="popular-posts-img"><img src="{{ popular_post.img }}" alt="{{ popular_post.title }}"></div>
{%- endif %} #}
<div class="popular-posts-title"><a href="/{{ popular_post.path }}" rel="bookmark">{{ popular_post.title }}</a></div>
{# {%- if popular_post.excerpt and popular_post.excerpt != '' %}
<div class="popular-posts-excerpt"><p>{{ popular_post.excerpt }}</p></div>
{%- endif %} #}
</li>
{%- endfor %}
</ul>
{%- endif %}
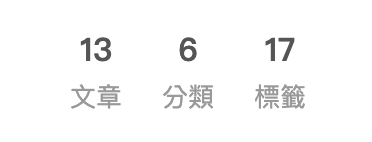
Pin Top 置頂文章
https://github.com/netcan/hexo-generator-index-pin-top
移除原本的 index 套件,安裝 pin top 套件1
2yarn remove hexo-generator-index
yarn add hexo-generator-index-pin-top
在文章上方加上 top ,順序以降序排序,也可以都設為 true,將以日期排序1
2
3
4
5
6
7---
title: 🏡 My Smart Home
date: 2021-12-04 16:20:00
categories: 🏠 智慧家庭
tags: [智慧家庭]
top: 2
---
Next 主題顯示置頂
於 _config.next.yml 打開 custom_file_path 的 postMeta:1
2custom_file_path:
postMeta: source/_data/post-meta.njk
source/_data/post-meta.njk1
2
3
4
5
6{%- if post.top %}
<div class="post-meta-top-bg"></div>
<span class="post-meta-top">
<i class="fa fa-thumbtack"></i>
</span>
{%- endif %}
source/_data/styles.styl1
2
3
4
5
6
7
8
9
10
11
12
13
14
15
16
17
18
19
20/**
* Post Top
*/
.post-block {
position: relative;
}
.post-meta-top-bg {
position: absolute;
top: 0px;
right: 0px;
border-top: 50px solid var(--theme-color);
border-left: 50px solid transparent;
}
.post-meta-top {
position: absolute;
top: 5px;
right: 10px;
transform: rotate(45deg);
color: var(--brand-color);
}
Next 主題
主要以提升使用者體驗為主,為了畫面簡潔我會移除一些我認為使用者不需要知道的資訊。
以下設定沒特別說明將會是
_config.next.yml主題設定檔案。
關閉 Site State
1 | site_state: false |
顯示 License
1 | creative_commons: |
歸檔(archives)其實是文章列表
歸檔頁面就是照年份列出所有文章,很多用 hexo 建置都會有這頁,但根本看不懂這頁的用途,沒有使用者會想要點 歸檔 頁面,所以我將其改名為 文章列表 。
更改 icon,調整順序第2個1
2
3
4
5menu:
home: / || fa fa-home
archives: /archives/ || fa fa-list
categories: /categories/ || fa fa-th
tags: /tags/ || fa fa-tags
設定語系檔案 source/_data/languages.yml
https://theme-next.js.org/docs/theme-settings/internationalization.html1
2
3
4
5
6# node_modules/hexo-theme-next/languages/zh-TW.yml
zh-TW:
title:
archive: 文章列表
menu:
archives: 文章列表
Footer
設定年份、開啟動畫(跳動)、關閉強力驅動1
2
3
4
5
6footer:
since: 2022
icon:
name: fa fa-heart
animated: true
powered: false
主題色
#1CAE9F
Theme Color
會更改 header 背景的顏色和 theme-color 的 meta tag1
2
3
4# Browser header panel color.
theme_color:
light: "#1CAE9F"
dark: "#1CAE9F"
Footer icon color1
2
3footer:
icon:
color: "#1CAE9F"
Sidebar color
這個沒有參數可以改,要用 Custom Files 去更改
source/_data/variables.styl1
2
3
4
5
6
7
8
9
10
11$primary = #1CAE9F
/**
* overwrite theme variables
* @see node_modules/hexo-theme-next/source/css/_variables/Pisces.styl
*/
// Sidebar
// --------------------------------------------------
$sidebar-nav-hover-color = $primary
$sidebar-highlight = $primary
文章 Meta
顯示於文章下方的資訊,關閉更新時間

1 | post_meta: |
文字置左
預設 justify 常常會出現奇怪的排版1
2
3text_align:
desktop: left
mobile: left
Mobile 畫面間距
減少文章顯示的左右間距1
2# Reduce padding / margin indents on devices with narrow width.
mobile_layout_economy: true
Codeblock
還是習慣使用 onedark 的樣式,Hexo 那邊有可選擇用 highlight 或是 prismjs 渲染
渲染選擇 highlight
prismjs 會讓字體變大成 18px,而且不能使用 Next 的 mac style1
2
3
4
5
6
7
8
9
10
11
12
13
14codeblock:
# Code Highlight theme
# All available themes: https://theme-next.js.org/highlight/
theme:
light: base16/onedark
dark: base16/onedark
prism:
light: prism
dark: prism
# Add copy button on codeblock
copy_button:
enable: true
# Available values: default | flat | mac
style: mac
顯示滾動百分比顯示在 back2top 上
1 | back2top: |
圖片預覽 - Fancybox
1 | fancybox: true |
留言功能選擇 - disques
- Disqus
- 登入選擇多 FB/Google
- 版面雜亂
- Gitalk
- 需要登入 Github,綁定 Github issue
- 畫面簡潔,功能方便,但要由權限過多
- utterances
- 需要登入 Github,綁定 Github issue
- 畫面簡潔,適合單純的留言
我選擇登入選擇多的 Disqus
關閉動畫
動畫會增加從進來網站到看到文章的時間,Next 無法調整動畫順序和時間,所以乾脆關掉1
2motion:
enable: false
載入進度條
載入時網頁上方顯示的進度條1
2
3
4pace:
enable: true
color: black
theme: flash
CDN 設定
啟用 CDN 載入一些第三方套件,會加快很多1
2vendors:
internal: cdnjs
預載入 - 優化 SEO LCP
加入 preconnect 加速第三方資源載入1
2
3# Preconnect CDN for fonts and plugins.
# For more information: https://www.w3.org/TR/resource-hints/#preconnect
preconnect: true
常常用圖片來源 unsplash 也加進去1
2custom_file_path:
head: source/_data/
source/_data/head.njk1
2
3{# SEO #}
{# improve LCP(Largest Contentful Paint) #}
<link rel="preconnect" href="https://images.unsplash.com" />
動態背景
canvas-nest.js 自 v8.0.0 後就因為 太消耗 CPU 被移除了,可以手動在 footer.njk 加入1
2custom_file_path:
footer: source/_data/footer.njk
source/_data/footer.njk1
2
3{# canvas-nest #}
{# https://github.com/theme-next/theme-next-canvas-nest #}
<script color="34,34,34" opacity="0.5" zIndex="-1" count="99" src="https://cdnjs.cloudflare.com/ajax/libs/canvas-nest.js/1.0.1/canvas-nest.js"></script>
或者是使用新的 ribbon.js ,但是預設會有 點擊更換背景 的奇怪功能,還是需要手動引入把這功能取消掉,Next 的設定則不需要打開1
2canvas_ribbon:
enable: false
source/_data/footer.njk1
2
3
4
5
6
7
8
9{# ribbon.js without click #}
{# https://github.com/hustcc/ribbon.js #}
<script>
function removeRibbonClick() {
document.onclick = null
document.ontouchstart = null
}
</script>
<script size="150" alpha='0.4' zIndex="-1" src="https://cdnjs.cloudflare.com/ajax/libs/ribbon.js/1.0.2/ribbon.min.js" onload="removeRibbonClick()"></script>
Next 客製化調整
Global - PaddingTop, 圓角…
因應圓角設計,上方增加間距1
2
3
4
5
6// padding-top for main
+desktop() {
.main {
padding-top: 12px; // same as sidebar margin-top
}
}
預設太過方正,增加圓角讓畫面更加舒服
延伸閱讀: UI/UX|下次主管問你為什麼 UI 要用圓角的時候1
2
3
4
5
6
7// rounded corners
+desktop() {
.header-inner, .sidebar-inner, .post-block, .comments, .pagination {
overflow: hidden;
border-radius: 12px ;
}
}
移除最上方的 headband1
2
3
4// remove headband
.headband {
display: none ;
}
mobile 顯示 subtitle 時會讓 header 看起來過高,所以隱藏讓版面看起來更舒服1
2
3
4
5
6// hide subtitle for mobile
+tablet-mobile() {
.site-subtitle {
display: none ;
}
}
列表(Archive Page) 隱藏 繼續努力(Keep on posting)
1 | // Hide "Keep on posting" |
文章頁面(Post Page) h3 不要顯示底線
h1 過多會影響SEO,我的內文子標題通常是用 h2 和 h3,但是預設 h3 會有底線,不太好辨識是 h2 還是 h3,所以把 h3 的底線隱藏1
2
3.post-body h3 {
border-bottom: none ;
}